In the field of optics, glass optical components' performance directly affects the overall effect of the optical system. In addition to spectral parameters and surface finish, the surface shape of optical elements is also one of the critical factors. Many customers might overlook the importance of surface shape while inspecting spectral performance, leading to subpar overall imaging quality even if the spectral standard is met. Therefore, understanding and optimizing the surface shape of glass optical components is a key step in ensuring their high-quality performance.
What is the Surface Shape of Glass Optical Components?
Glass optical components' surface shape, simply put, is the flatness of the element's surface. Just like a smooth and flat road ensures stable and fast travel for vehicles, a flat surface of an optical element ensures accurate light transmission. Conversely, if the surface has high and low irregularities or irregular shapes, it affects the refraction and reflection of light, leading to decreased image quality.
In the optical processing process, deviations in the surface shape are quantified through multiple parameters, commonly including PV value (Peak-to-Valley) and RMS value (Root Mean Square). The PV value represents the height difference between the highest and lowest points on the optical element's surface, while the RMS value is the average deviation of surface data points within the detection area. These parameters help us better understand the flatness and quality of the optical surface.
PV and RMS relationship
For surface shape detection of glass optical components, PV and RMS values are important indicators. The PV value is usually 6 to 8 times the RMS value; thus, a good PV value usually implies a high flatness of the surface shape. However, the PV value only considers the peaks and valleys of the surface, excluding minor local errors. The RMS value, on the other hand, calculates the average of multiple data points within the area, reflecting the surface shape error more comprehensively.
By understanding these indicators, we can more clearly know that optical elements with good surface shape can effectively reduce optical aberrations and improve image clarity. Therefore, when designing and manufacturing glass optical components, surface shape parameters must be considered as important quality control factors.
Glass Optical Components' Surface Shape Detection Methods
To ensure the surface shape accuracy of glass optical components, interferometers are commonly used detection tools. Interferometers can visually display the concavity and convexity of the optical element's surface through the phenomenon of light interference. By generating 3D models, technicians can accurately observe the geometric deviations of the element surface from the ideal design.
In addition to 3D models, interference fringe patterns are also key tools for detecting surface shape. They provide more detailed information by showing the microstructure and interference phenomenon on the surface of optical element. Through these advanced detection means, we can ensure that each optical element's surface shape meets high precision requirements, thereby improving the overall performance of the optical system.
The Impact of Surface Shape on Glass Optical Components' Performance
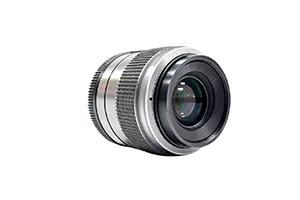
High-quality glass optical components must possess accurate surface shape to ensure light transmission and imaging quality. Poor surface shape elements may cause issues such as astigmatism, aberrations, and distortions in the optical system, ultimately affecting the image quality. The requirements for surface shape accuracy are particularly stringent in high-end optical systems such as microscopes, telescopes, and camera lenses.







 EN
EN
